High-quality business-class email provides a number of benefits to your business, such as communicating your company name, brand or product to your clients, better security, personalized email address with your website … etc.
That is the reason why any respectable business needs their email hosted with their website, using the company domain name.
Local Europe or US-based servers provide top-notch service, albeit you want to get your mail through a Web browser, mobile phone, tablet or other means.
Overview of how to get Business Email hosting with irIST Hosting
The process of getting the Business Class Email hosting service is very straightforward:
- Go to irIST Email Hosting page.
- Choose a hosting plan based on your needs and budget. Be aware that you can save up to 33% with a 60 month Business plan.
- Click Add to Cart.
- Proceed to checkout.
- Login to an your irIST account or
- Create a new account (if you are a first-time customer, returning customers with an existing account will have no problem login-in).
- Finish the purchase.
We can agree that the overall process is very similar to any other online purchase, with the first part being the purchase of business email service itself, and the second part being the email account setup.
Because there are a few nooks and crannies that have to be ironed out, we will go through the whole process in more detail.
Step-by-step instructions for how to get Business Email hosting
Let’s get into the whole process of getting the Business Email hosting in a bit more detail.
There you will find information about different Email hosting plans.

Personal plan is a good choice for a personalized email with your website domain name.
Business Plan is the one you want as it supports up to 5 email addresses that will be hosted on your website domain. This should be enough to suffice for example a support@yourdomain, info@yourdomain and a few personal emails for executive members – yourname@yourdomain.
The Unlimited Business plan is aimed at corporate and enterprise customers who need ample storage.
2. Choose a hosting plan based on your needs and budget. Be aware that you can save up to 33% with a 60-month Business plan.
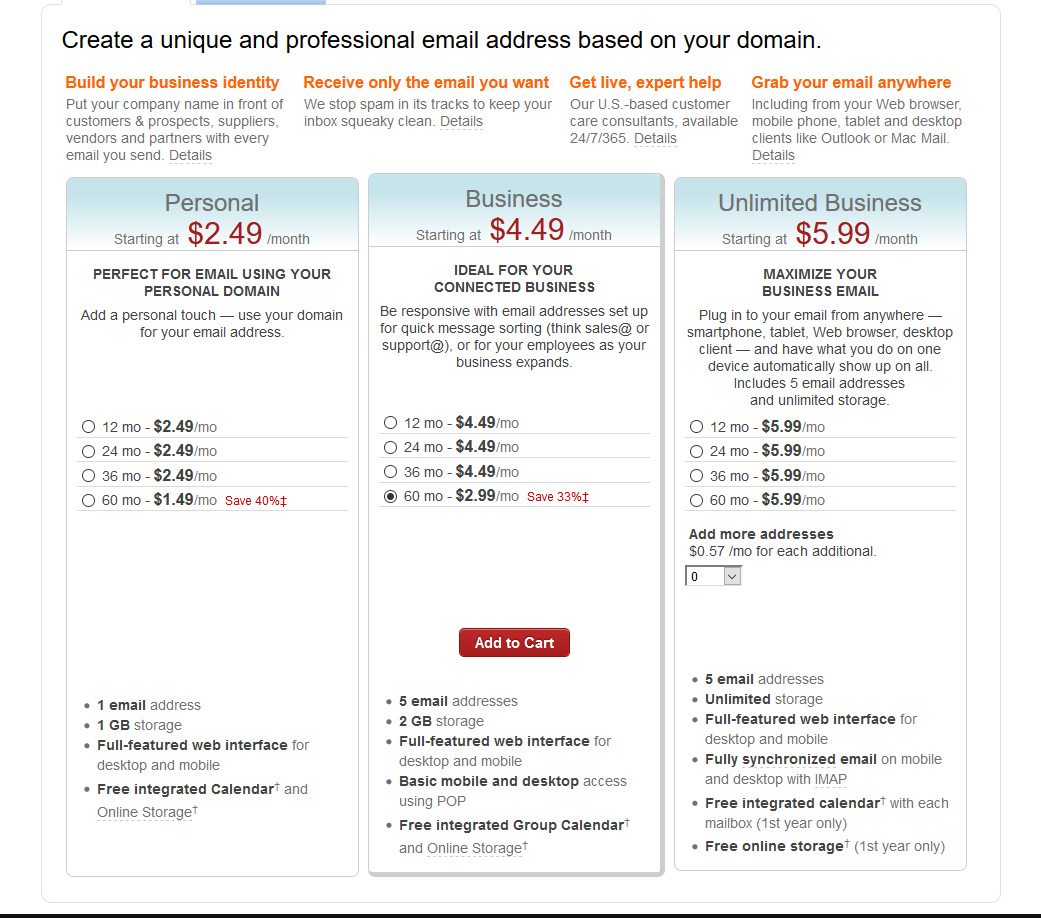
A business email is not something you change often, else your business associates and customers will have a hard time trying to contact you by mail. Having this in mind, while you choose a plan that suits your needs, be aware that the longer service period will provide you a substantial saving on the service price. Choose the maximum service period for which you feel comfortable that you will be doing business at the website domain name.
3. Click Add to Cart. This step is pretty straightforward.
4. Proceed to checkout. You will be greeted with a login screen.

5. Login to your irIST account (returning customer)

Depending if you are a returning or a new customer, you will have to enter your existing irIST hosting account information and choose to Sign In … or
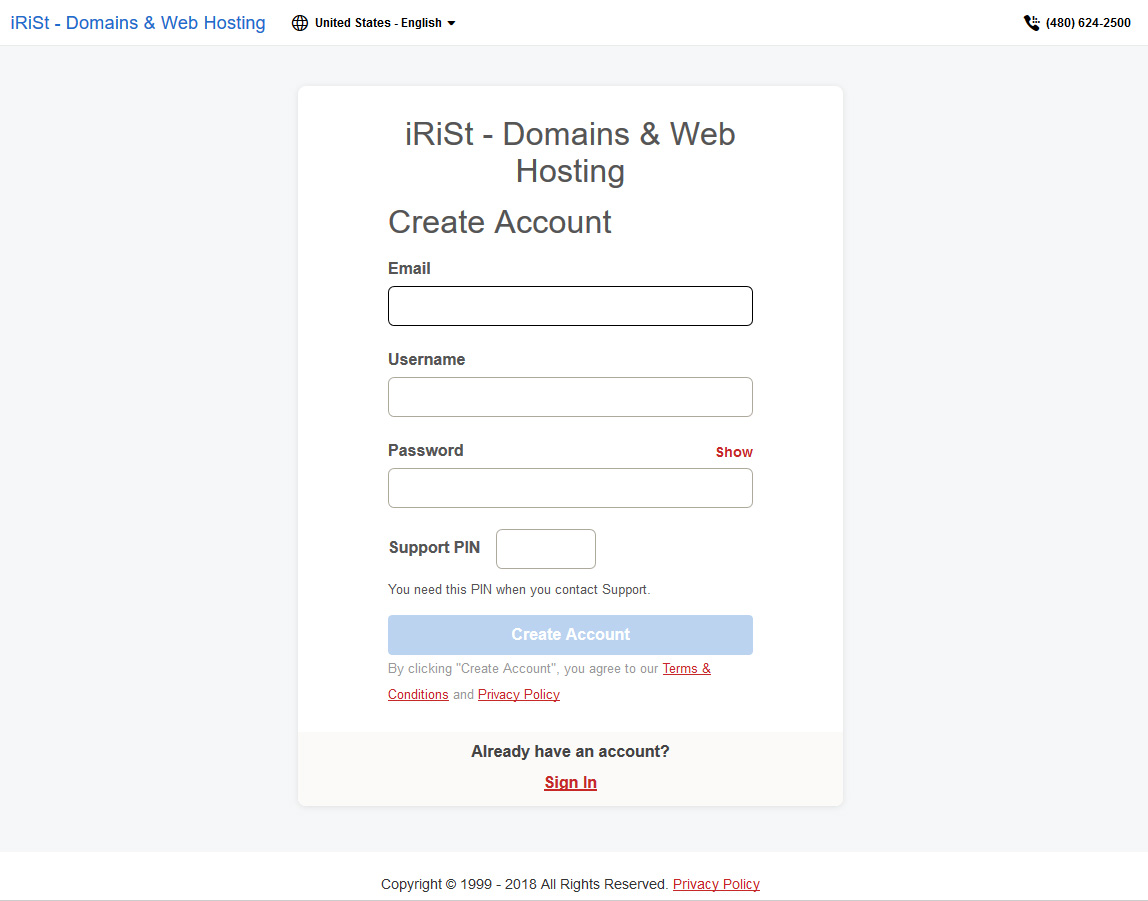
6. Create a new account (if you are a first-time customer, returning customers with an existing account will have no problem login-in).
In the process of creating a new account be sure to enter accurate information. Take note that entering fake personal or company information may result in loss of hosting ownership or a number of different legal issues.
6.1 First enter your current email, then the username of your choice.
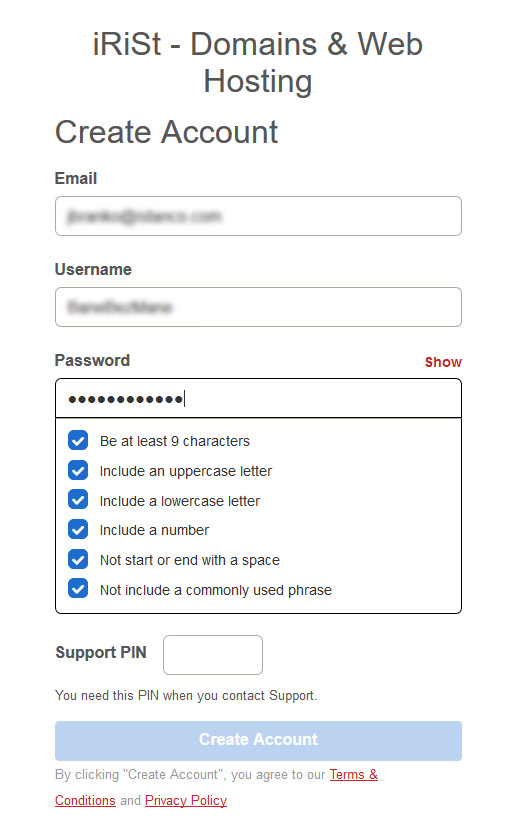
The username can have minimum 5 and up to 50 characters, it must contain at least one letter and no spaces. The username must be unique with irIST account database.

Enter a password of your choice, with regard to following rules:
- Password length must be minimum 9 characters
- At least one uppercase letter
- At least one lowercase letter
- At least one number
- No spaces
- No commonly used phrases
Next, enter your desired Support PIN which will be asked from you when you contact irIST Support.

Support PIN must have exactly 4 numbers. No repeated digits (example: 4444, 1111 … etc. are not allowed) and non sequentials (example: 1234, 4567, 6789 and similar are not allowed).

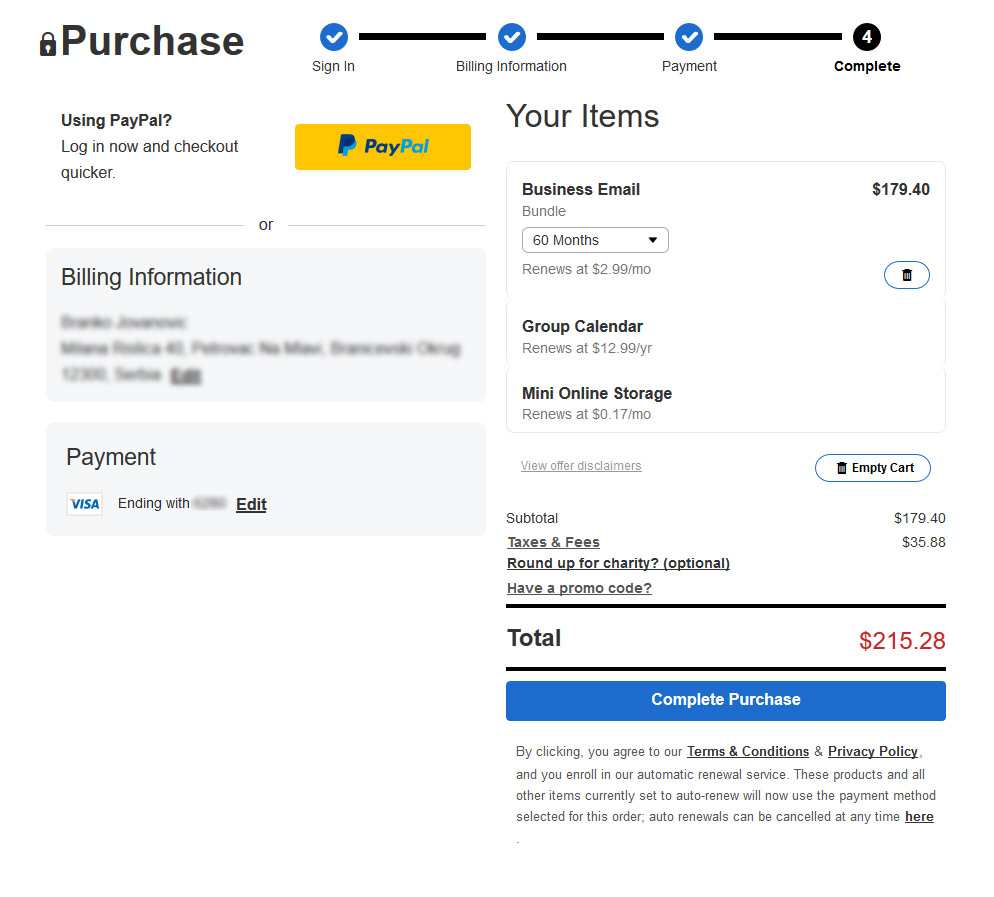
7. Finish the purchase within the purchase window.
7.1. Billing information
Take a little time and review your purchase choice on the right side of the window. If everything is in order then fill the billing information.
Be sure to enter information accurately, without any fake data as it may lead to loss of account ownership, and click the Save button.
7.2. Payment information

Choose your favorite payment option, enter your payment information and click save.
7.3. Finally, Click complete purchase.
You are now a proud owner of an Email Hosting service with irIST Hosting, and now we need to walk you through the setup of the Business Email service itself.